Scan Documents To PDF Edit For Free Complete Workflow Guide For Mac
Transitioning from physical paper to digital files is a critical step in modernising any personal or professional workspace. However, the process of scanning documents often creates a new frustration: the resulting files are rigid images rather than editable text. Mac users frequently assume that modifying these digitised files requires purchasing expensive software suites, but this is a misconception. Apple’s ecosystem is equipped with powerful, built-in utilities that can handle the entire lifecycle of a document. By learning how to scan documents to PDF and edit for free using native macOS tools, you can create a seamless, cost-free workflow. This comprehensive guide details every step of the process, from capturing the physical page to applying Optical Character Recognition and making structural modifications, all without spending a penny.

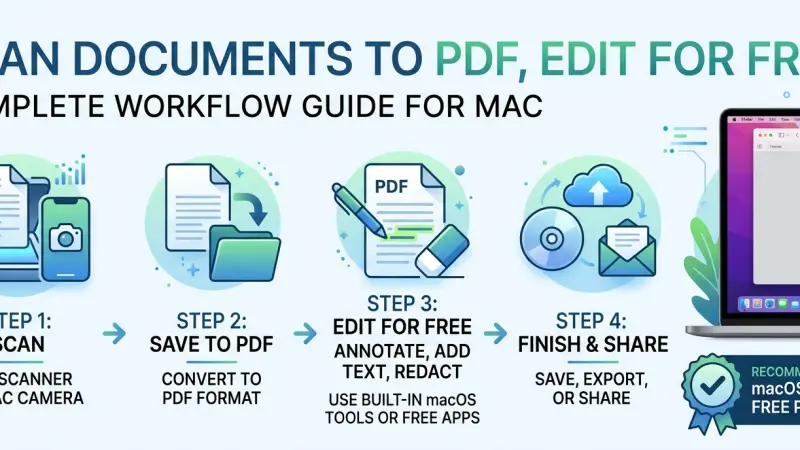
Overview of the Scanning and Editing Workflow
To successfully digitise and modify paperwork, it is necessary to understand the underlying technology that governs how scanners and computers interpret visual data. A scanner does not read text; it captures a digital photograph of a piece of paper.
The Challenge with Scanned Documents
When you feed a document into a scanner, the hardware translates the light and dark areas of the physical page into digital pixels. The resulting file, usually saved as a PDF, is functionally identical to a photograph taken with your smartphone. You cannot click on the text, you cannot search for specific keywords using the search bar, and you certainly cannot backspace over a typo. The text is part of the image itself. To transition from a static image to a modifiable document, a specific technological bridge is required to analyse the visual shapes of letters and convert them back into live, digital text.
Mac's Native Ecosystem Advantage
Apple has deliberately designed macOS to handle this workflow without requiring third-party applications for basic tasks. The operating system includes Image Capture for interfacing with scanners, Preview for viewing and annotating the resulting files, and Live Text for on-the-fly character recognition. By combining these built-in tools in a specific sequence, Mac users can achieve a level of efficiency that rivals expensive document management software, entirely bypassing the need for costly subscriptions or unsecure web-based converters.
Benefits of Digitising and Modifying Documents Locally
Choosing to process your paperwork directly on your Mac, rather than relying on cloud services or physical filing cabinets, provides substantial advantages across security, efficiency, and organisation.
Enhanced Security and Privacy
Physical documents are inherently vulnerable. They can be lost, damaged by water or fire, or viewed by unauthorised individuals. Conversely, uploading sensitive documents to free online editing websites introduces severe digital privacy risks, as you have no control over how the server processes or stores your data. Scanning and modifying documents locally on your Mac ensures that sensitive information, such as tax records, medical forms, or legal contracts, never leaves your immediate control. The data remains securely on your encrypted hard drive, mitigating the risk of third-party data breaches.
Improved Searchability and Organisation
A filing cabinet requires meticulous manual indexing to be useful. Digital files, when processed correctly, index themselves. By applying character recognition to your scanned PDFs, you turn static images into dynamically searchable data. macOS Spotlight can then instantly locate a specific document based on a single keyword buried deep within a hundred-page file. This capability fundamentally changes how you interact with your archives, reducing the time spent searching for information from minutes to milliseconds.
Cost and Time Efficiency
The financial savings of avoiding premium software subscriptions are immediately apparent. However, the temporal savings are equally significant. A streamlined local workflow eliminates the need to wait for large files to upload to cloud servers, process on remote hardware, and download back to your machine. Everything happens at the speed of your Mac's internal processor. Furthermore, having an established, repeatable workflow removes the cognitive friction of figuring out how to handle each new piece of paperwork, making administrative tasks significantly faster.
Step-by-Step Details: Scanning Documents to PDF on Mac
The foundation of a good digital document is a high-quality scan. macOS provides dedicated software to communicate with your scanner and optimise the capture process.
Preparing Your Physical Documents
Before opening any software, take the time to prepare the physical paper. Remove all staples, paper clips, and sticky notes. Smooth out any creased or crumpled edges, as folds can cast shadows that confuse scanning software and degrade character recognition accuracy. Ensure the scanner glass is completely clean and free from dust or smudges, as these imperfections will appear as dark spots on your digital file and can sometimes be misinterpreted as punctuation marks during the text recognition phase.
Using the Image Capture Application
Image Capture is a powerful, often overlooked utility pre-installed on every Mac. Connect your scanner to your Mac via USB or ensure both devices are on the same Wi-Fi network if you are using a wireless scanner. Open Image Capture from your Applications folder. In the left-hand sidebar, select your scanner.
The main window will display a preview of the scanner bed. Before clicking the scan button, you must configure the output settings. In the bottom bar, change the Format dropdown menu to PDF. This is crucial, as it may default to JPEG, which is unsuitable for multi-page text documents. Ensure the Resolution is set to at least 300 DPI for text documents to ensure clarity, and set the Scan To destination to your desired folder.
Scanning Directly via Printers and System Settings
Many modern multi-function printers offer their own scanning interfaces, but macOS also includes a streamlined scanning feature within System Settings. If you prefer not to use Image Capture, you can navigate to your printer settings. For wireless scanners, ensure the device is awake and connected. macOS will often detect the scanner automatically, allowing you to initiate a scan directly from the print dialogue box in applications like Preview. While this method is faster, it offers fewer granular controls over resolution and cropping compared to Image Capture, making it better suited for quick, single-page captures rather than comprehensive archive projects.
Step-by-Step Details: Applying OCR for Free
Once you have your PDF image, you must apply Optical Character Recognition to make the text editable. While Mac does not have a native "save as OCR PDF" button in the same way some Windows software does, it offers highly effective alternative methods.
Understanding Optical Character Recognition
Optical Character Recognition is the technology that analyses the shapes of letters in an image and matches them against a database of known fonts and character structures. When successful, OCR creates an invisible layer of live text positioned directly over the visual image of the text. To the human eye, the document looks identical, but to the computer, the text is now selectable, searchable, and copyable. The accuracy of OCR depends heavily on the quality of the original scan; blurry text, skewed angles, or unusual fonts will result in errors during the recognition process.
Leveraging Apple's Built-in Live Text Feature
macOS Monterey and later versions include a feature called Live Text, which performs real-time OCR directly within the operating system. Open your scanned PDF in Preview. Hover your cursor over the text. If the text is clear enough, the cursor will change from a standard arrow to a text selection cursor. You can then click and drag to highlight the text, copy it, and paste it into a word processor like Pages or TextEdit. While this does not permanently embed the text into the PDF file itself, it is an incredibly fast, completely free way to extract and modify text from a scanned image without using any third-party software.
Utilising Online OCR Tools Securely
If you need to permanently embed the text into the PDF file so that it is universally searchable, you may need to use a free online OCR converter. Because this involves uploading your file to a third party, you must exercise caution. Only use reputable services that explicitly state they delete files automatically after processing. Upload your scanned PDF, allow the server to run the recognition algorithm, and download the resulting searchable PDF. Once the file is back on your Mac, you can safely disconnect from the internet and proceed with editing, knowing the data has been retrieved and processed.
Step-by-Step Details: Editing the Digitised PDF for Free
With your scanned document now converted into a searchable PDF, you can begin the modification process using Mac Preview. It is important to remember that Preview excels at annotation and overlay, not deep structural text editing.
Opening and Annotating in Mac Preview
Locate your processed PDF in Finder and double-click it to open it in Preview. If it opens in a different application, right-click the file, select Open With, and choose Preview. Once the document is open, click the Markup toolbar button, which looks like a pen tip inside a circle, located near the top right corner of the window. This action reveals a secondary toolbar containing all the tools necessary for modifying your document, including text insertion, shape drawing, and signature application.
Adding Text, Signatures, and Highlights
To add new information to the document, click the Text tool, represented by a capital T. A text box will appear on the document. Drag this box to the desired location and double-click inside it to type. You can format this text by clicking the Text Style button in the toolbar, allowing you to match the font, size, and colour of the newly added text to the surrounding original text. To sign the document, click the Sign icon. You can create a signature using your Mac's trackpad or by holding a signed piece of paper up to the camera. The signature is saved as a movable overlay that you can resize and position over the signature line. The highlight tool allows you to emphasise important sections of the recognised text by dragging your cursor over the words.
Rearranging and Merging Pages
Preview also functions as a basic file manager for PDFs. To view the individual pages of your document, ensure the sidebar is visible by clicking View in the top menu bar and selecting Show Thumbnails. You can click and drag the page thumbnails up or down to reorder the document. If you need to delete a page, simply select its thumbnail and press the Delete key on your keyboard. To merge multiple scanned PDFs into a single file, open one document, ensure the thumbnail sidebar is open, and drag the second PDF file from a Finder window directly into the sidebar of the first document.
Essential Tips for High-Quality Scans and Edits
Achieving professional-grade results requires attention to detail during both the physical scanning phase and the digital editing phase. Implementing these practices will significantly reduce errors and improve the readability of your archives.
Optimising Scanner Settings
The default settings on most scanners are designed for general use and are rarely optimal for text recognition. For text documents, always select a resolution of 300 DPI. Scanning at a higher resolution, such as 600 DPI, will drastically increase your file size without providing a noticeable improvement in text recognition accuracy.
Furthermore, scan in Grayscale rather than full Colour unless the document contains coloured charts or images essential to its meaning. Grayscale scanning removes background colour noise, making it easier for the OCR software to distinguish the black text from the white background.
Managing File Sizes
Multi-page scanned PDFs can quickly consume significant hard drive space, especially if scanned at high resolutions in full colour. To manage this, use Preview to compress the files after you have finished editing them. Open the PDF in Preview, select File, and choose Export. In the export menu, locate the Quartz Filter dropdown menu and select Reduce File Size. This built-in macOS algorithm aggressively compresses the image data within the PDF, often reducing the file size by over fifty percent while maintaining surprising visual clarity for on-screen reading.
Common Mistakes When Scanning and Editing PDFs
Even with a clear workflow, users frequently make errors that compromise the quality or usability of their digitised documents. Recognising these pitfalls is the easiest way to avoid them.
Scanning at Excessively High Resolutions
A prevalent mistake is the assumption that scanning at the highest possible resolution yields the best results. In reality, scanning a standard text document at 1200 DPI creates an unnecessarily massive file that slows down your Mac, takes up excessive cloud storage space, and can actually confuse OCR algorithms by emphasising the microscopic imperfections of the paper fibres. Sticking to a strict 300 DPI standard for standard text documents is the most efficient and accurate approach.
Ignoring Document Alignment
If a document is placed crookedly on the scanner glass, the resulting PDF will be skewed. While humans can easily read text at a slight angle, OCR software struggles significantly with skewed text. If the angles are too severe, the software may fail to recognise lines of text entirely, treating them as meaningless shapes. Always take the extra few seconds to align the paper perfectly flush against the scanner's guide edges before closing the lid.
Attempting to Edit Without OCR
The most frustrating mistake is attempting to use Preview’s Text tool to replace existing text that has not been run through an OCR process. Because a raw scanned PDF is just an image, drawing a white box over the old text and typing new text next to it is the only workaround. This creates a messy, unprofessional result where the text does not align properly. Always apply character recognition before attempting to modify the existing content of a scanned document.
Supporting Local Business Visibility Beyond Core Marketing Efforts
Beyond document workflows, businesses often rely on digital visibility to stay competitive. While marketing campaigns drive traffic, foundational elements like discoverability and consistent presence across platforms also play a crucial role.
Maintaining accurate listings on platforms such as Local Page UK helps reinforce trust and ensures that customers can find reliable business information easily. Using a free company listing platform can act as a supportive layer, strengthening visibility without requiring heavy investment.
Similarly, being present on a list services uk directory or a structured business directory website improves local discovery. A well-maintained business listings site contributes to credibility, ensuring consistency across search results and reinforcing trust signals for potential customers.
Rather than serving as primary marketing tools, these listings function as long-term visibility assets that support broader digital strategies.
Mastering
Mastering the transition from physical paper to a fully editable digital format does not require expensive software or complicated technical knowledge. By utilising the built-in capabilities of your Mac, specifically Image Capture for high-quality scanning and Preview for annotation, you can create a highly efficient, entirely free document management workflow. The critical bridge in this process is understanding and applying Optical Character Recognition, whether through macOS Live Text or secure online converters, to transform static images into dynamic, searchable data. By adhering to best practices like optimising DPI settings and ensuring proper document alignment, you can ensure your digitised archives are both professional in appearance and easy to manage. Take control of your paperwork today by implementing this straightforward workflow and experience the immediate benefits of a clutter-free, fully searchable digital environment.
Frequently Asked Questions
Can I scan a document directly into PDF format on a Mac without downloading software? Yes. You can use Image Capture, a pre-installed macOS utility. Connect your scanner, open Image Capture, select your device, and choose PDF from the format dropdown before scanning.
Why can’t I select or edit text in my scanned PDF? A scanned PDF is essentially a digital image of a document. The text is part of that image, not actual editable text. To make it selectable or editable, you need to apply Optical Character Recognition (OCR).
Is there a completely free way to perform OCR on a Mac? macOS includes Live Text, which can recognise and copy text from images in Preview and other apps. However, to permanently embed editable text into a PDF, you may need an online OCR tool—though you should avoid uploading sensitive documents.
How do I add my signature to a scanned document for free? Open the PDF in Preview, click the Markup toolbar, and select the Sign icon. You can create a signature using your trackpad or your Mac’s camera. The signature will then be saved and can be placed anywhere on the document.
What resolution should I use when scanning text documents? A resolution of 300 DPI is ideal for most text documents. It offers a good balance between clarity and file size. Higher resolutions, such as 600 DPI, typically increase file size without significantly improving readability.
Can I combine multiple scanned PDFs into one file using Preview? Yes. Open one PDF in Preview, display the thumbnail sidebar, and drag additional PDF files from Finder into the sidebar. You can rearrange pages and save the merged document.
How do I reduce the file size of a large scanned PDF? Open the PDF in Preview, go to File > Export, and select Reduce File Size from the Quartz Filter options. This compresses the file and reduces its size.
What happens if my document scans crookedly? A skewed scan can reduce OCR accuracy, as text recognition works best when lines are horizontal. Always align your document properly on the scanner before scanning.
Can I delete a specific page from a scanned PDF on a Mac? Yes. Open the PDF in Preview, enable the thumbnail sidebar (View > Show Thumbnails), select the page you want to remove, and press the Delete key.
Is it safe to use online tools for scanned tax documents? No. Uploading sensitive documents such as tax returns or medical records to
free online tools can pose serious privacy risks. It’s safer to use offline tools like Preview or Live Text.
How do I change the font of text I add in Preview? After inserting a text box, select it and click the Text Style button in the Markup toolbar. From there, you can adjust the font, size, colour, and alignment to match your document.

Disclaimer: The information provided in this article is for general informational and research purposes only. Company details, features, services, and market positions may change over time. Readers are advised to visit official company websites and conduct independent research before making any business decisions or purchasing services.
Most Searchable Keywords

Recent Blogs


Related Listings


Categories
- Accountants (295)
- Advertising Agencies (559)
- Architects (149)
- Automobiles (377)
- Beauty (300)
- Carpenters (146)
- Cleaning Services (386)
- Dentists (189)
- Driving (62)
- Electricians (215)
- Energy (8)
- Event Organiser (685)
- Finance (599)
- Guide (3365)
- Health (2207)
- Information technology (206)
- Legal Services (353)
- Logistics (6)
- Maintenance (65)
- Manufacturing (35)

Sponsored Listings in Locksmith Services


Related Blogs

Gen Z Political Reporters and News Creators i...
Read this insightful article "Gen Z Political Reporters and News Creators in the UK" to expand your knowledge!

Famous Female Social Media Influencers Across...
Read this insightful article "Famous Female Social Media Influencers Across the UK" to expand your knowledge!

Your UK Sponsor Licence 2026 Step by Step Gui...
Read this insightful article "Your UK Sponsor Licence 2026 Step by Step Guide" to expand your knowledge!
Questions & Answers – Find What
You Need, Instantly!
How can I update my business listing?
Is it free to manage my business listing?
How long does it take for my updates to reflect?
Why is it important to keep my listing updated?
