
How to Join Two Shipping Containers A Complete UK Guide
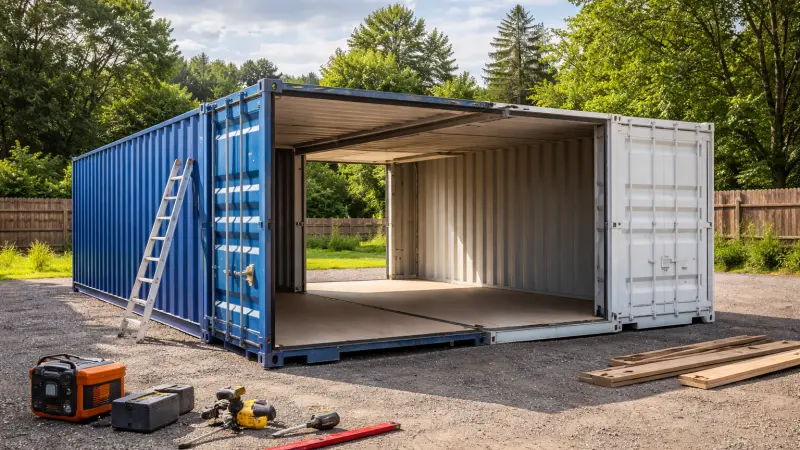
Whether you are planning a shipping container home, a modular workspace, or an off-grid retreat, this step-by-step guide covers everything you need to know about combining containers safely in the UK.
Joining two shipping containers is an increasingly popular approach for UK homeowners, self-builders, and small business owners looking for affordable, adaptable spaces. The process, however, is not simply a matter of placing two steel boxes next to each other and hoping for the best. It requires careful structural planning, the right tools and materials, and — in most cases — input from a qualified structural engineer.
This guide explains precisely how to join two shipping containers, whether side by side or stacked vertically, using practical, UK-relevant advice you can apply to your own project.
Why Join Two Shipping Containers?
Before examining the mechanics, it is worth understanding the motivations behind combining containers. Standard ISO shipping containers come in fixed dimensions: typically 20 feet (6.1 m) or 40 feet (12.2 m) in length, and 8 feet (2.44 m) in width. That width is the primary constraint — for most residential or commercial applications, a single container simply does not offer enough lateral space.
There are several compelling reasons why UK self-builders and contractors choose to join containers together:
- Expanded internal footprint — Joining two 8-foot-wide containers side by side effectively doubles your usable width to approximately 16 feet, creating far more practical living or working space.
- Cost efficiency — Even when accounting for the labour and materials involved in joining, a multi-container structure remains substantially less expensive than a comparable brick-and-mortar build in most parts of the UK.
- Speed of construction — Shipping containers arrive as pre-fabricated steel units, dramatically reducing the overall build timeline compared to conventional construction methods.
- Structural versatility — Containers can be merged, stacked, or offset to produce a wide variety of architectural configurations, from simple bungalows to multi-storey modular homes.
- Sustainability — Repurposing used shipping containers is a meaningful act of upcycling. The UK generates significant demand for low-carbon construction methods, and container architecture supports that goal.
In England and Wales, using shipping containers as permanent dwellings typically requires planning permission from your local planning authority. Always consult your local council before beginning any structural modifications to ensure your project complies with permitted development rights and building regulations.
Step 1 — Prior Preparations & Structural Planning
Thorough preparation is the single most important factor in a successful container joining project. Skipping this stage invariably leads to costly remedial work later. Here is what you need to address before any physical work begins.
Architectural Design and Spatial Planning
Begin with a clear architectural drawing or schematic of your intended structure. This does not need to be a formal set of architect's drawings at the outset, but you must know how the containers will relate to one another — whether side by side, end to end, or stacked — and where openings such as doors and windows will be located. The position of your openings will directly influence where structural steel reinforcement is required.
Inspecting Your Containers
Not every second-hand shipping container is suitable for structural modification. Before purchasing, inspect each unit thoroughly for the following:
- Corrosion and rust — Surface rust is common and manageable, but deep pitting or structural corrosion in corner posts or floor joists is a serious concern.
- Dimensional consistency — If you are joining two containers side by side, they must be the same height. Even slight discrepancies in the top rail height will create alignment issues that complicate the joining process.
- Corner post integrity — The corner posts are the structural backbone of any container. They must be free of significant dents or deformations, particularly if you intend to stack containers.
- Flooring condition — Many older containers have timber floors treated with chemicals that may be unsuitable for habitation. Check the condition and, where necessary, replace or seal the floor before beginning modification work.
Foundation Requirements
Shipping containers are designed to bear load only at their four corner posts. This means the foundation for your structure must support those specific points — a standard strip foundation or concrete pad is commonly used for UK container builds.
If you are joining containers side by side and removing internal walls, additional intermediate support may be required to prevent roof deflection over the wider span.
Step 2 — Arranging and Positioning Your Containers
Once your preparations are complete and you are confident in the structural integrity of both units, the next phase involves physically positioning the containers on your site. This step typically requires appropriate lifting equipment — either a crane or, for lighter units, a telehandler — operated by a qualified plant operator.
When positioning containers for side-by-side joining, bring both units as close together as possible whilst keeping the top rails level. Use a spirit level and laser level to confirm that the containers are aligned both horizontally and vertically. Even a few millimetres of misalignment can cause difficulties when cutting and sealing the join.
For stacked configurations, place the upper container on top of the lower unit using a crane, ensuring all four corner posts of the upper container sit directly on the corner posts of the lower container. This is non-negotiable — the load path runs through the corner posts, and any offset will introduce dangerous point loading on the roof structure.
Side-by-Side Joining: The Detailed Process
Joining two shipping containers side by side is the most common approach for creating open-plan spaces. Here is a step-by-step breakdown of the process used by experienced container modification contractors across the UK.
- Mark the cutting linesWith both containers positioned and levelled, use chalk or a scribe tool to mark the cutting lines on the long sides of each container that face one another. You will be removing most of this wall to open up the combined interior space.
- Retain structural marginsDo not remove the entire side wall. Retain a minimum of approximately 350 mm (around 14 inches) at each end of the aperture. This margin preserves the connection between the corner posts and the top and bottom rails, maintaining the structural integrity of each container.
- Reinforce the apertureBefore cutting, fit box-section steel reinforcement around the intended aperture. This steel framework takes on the load-bearing role previously held by the corrugated side wall and prevents deflection in the roof and floor structure. Your structural engineer should specify the correct section sizes for your span.
- Cut the side wallsUse an industrial plasma cutter or angle grinder to cut along the marked lines. Work methodically and ensure the area is clear of any flammable materials. Wear appropriate PPE throughout, including eye protection, gloves, and hearing protection.
- Seal the joinOnce both apertures are cut, apply expanding foam to any visible gaps between the two containers along the join line. This seals the structure against draughts and moisture ingress — both of which are significant concerns in the UK climate.
- Fit the PVC cappingApply PVC capping over the welded box-section brackets that protrude from each side of the joined units. Secure the capping using four screws — one at each corner — pierced from the upper edge of the PVC profile to hold it firmly in place.
- Apply flash bandingSmooth flash banding over the corner posts and down both sides of the join, extending it over the PVC cap for a weathertight finish. Flash banding is particularly important for outdoor exposed sections of the join, given the frequency of rainfall in the UK.
- Finish the interior floor joinPlace tread-plate steel across the interior floor at the join, then drill and screw it firmly into place. If your containers are ply-lined and insulated internally, allow additional time — typically half a day — to properly board out and finish the interior at the junction.
The removal of side walls in a shipping container significantly alters its structural behaviour. Always have the reinforcement design reviewed and approved by a chartered structural engineer before cutting commences. This is not only a matter of safety but may also be a requirement if you are seeking building regulations approval.
Stacking Shipping Containers
Stacking containers vertically is the preferred approach when land is limited or when a multi-storey layout is desired. This method is particularly popular in urban UK settings where plot sizes are smaller and building upwards is more practical than building outwards. The considerations for stacking are somewhat different from side-by-side joining, and the structural demands are correspondingly higher.
Container Quality and Load Capacity
Not all containers are equally well-suited to being stacked. Standard ISO containers are designed to carry vertical loads of up to 192 tonnes at their four corner posts during ocean freight operations, but this capacity diminishes significantly with age, corrosion, or structural modification. Before stacking, have both containers inspected and assessed for their suitability as structural components.
Corner-Post Alignment is Critical
The cardinal rule of stacking is that the corner posts of the upper container must sit directly above the corner posts of the lower container. The structural load flows through these posts — it does not distribute through the roof plate or the corrugated walls. A common error occurs when builders attempt to stack containers of different lengths without accounting for corner-post alignment: for example, if two 20-foot containers are placed at the base and a single 40-foot container is placed on top, the 40-foot unit's corner posts will align correctly with the outer corners of the 20-foot units below.
Reversing this configuration — placing the 40-foot container at the base and the two 20-foot units on top —
results in the upper containers' corner posts overhanging unsupported roof structure, which is a serious structural hazard.
Securing Stacked Containers
Stacked containers must be mechanically fixed to one another to prevent movement under wind load or seismic activity. The most common method in the UK is the use of twist locks — the same mechanism used to secure containers on cargo ships. Twist locks engage with the standard corner casting fittings on each container, locking the units together at all four corners. Welding is an alternative approach, particularly when a permanent installation is intended.
Lifting Equipment for Stacking
A crane is the most practical lifting solution for stacking shipping containers. The specific crane capacity required depends on the weight of the containers involved — an empty 20-foot standard container weighs approximately 2,270 kg (around 5,000 lb), whilst a 40-foot unit weighs in the region of 3,630–4,000 kg. Cranes must be rated appropriately and operated by a licenced operator in accordance with the Lifting Operations and Lifting Equipment Regulations 1998 (LOLER) in the UK.
Forklifts can be used as an alternative, but this requires specific spread capacity to reach the forklift pockets on the container's base frame. Standard 20-foot containers have forklift pockets with an internal separation of approximately 69 inches (1,750 mm). If the forklift's forks cannot achieve the required spread, fork extensions must be fitted — ensuring the forks are long enough to fully engage with the container base without risking puncture of the floor structure.
What Is Included in a Container Joining Kit?
For straightforward side-by-side joins, many UK suppliers offer a container joining kit that provides the key consumables and materials needed to complete the weatherproofing and finish of the joint. A standard kit typically comprises the following components:
These kits are designed to allow competent DIY self-builders to complete the cosmetic and weatherproofing elements of a join independently. However, the structural elements — reinforcement steel, welding, and corner-post securing — should always be carried out by, or under the direct supervision of, a qualified structural engineer or experienced container modification contractor.
Post-Join Checks and Finishing
Once the physical joining process is complete, it is essential to carry out a thorough post-join inspection before the structure is occupied or fitted out internally. This stage is often underestimated in terms of its importance, but it can save significant remedial costs if issues are identified early.
Walk the perimeter of the joined structure and inspect all exterior seams, weld points, and flash-banded sections for gaps, voids, or areas where moisture could penetrate.
The UK's wet climate means that any unsealed joint will admit water, which can lead to internal condensation, corrosion of the steel structure, and damage to insulation and internal finishes.
Internally, check the floor tread-plate for any movement or lifting at the screwed fixings. The tread-plate must sit flush with the container floor on both sides of the join, with no raised edges that could create a trip hazard.
If any welding was carried out as part of the joining process — either for the box-section reinforcement or for securing stacked containers — inspect the weld beads for continuity. There should be no visible porosity, cracking, or incomplete fusion. Where welds are structural, they should be inspected by a qualified welding inspector in accordance with applicable British Standards.
Finally, apply the matching paint provided in the joining kit, or a compatible exterior-grade paint, to any areas of bare steel exposed by cutting or welding. This is not merely cosmetic — protecting bare steel from oxidation is critical to the long-term durability of the structure.
Questions Clients Commonly Ask
In most cases, yes. If you intend to use joined containers as a permanent dwelling or commercial building, you will need to apply for planning permission from your local planning authority and ensure the project complies with Building Regulations. Temporary structures on certain land classifications may fall under permitted development rights, but this varies by local authority. Always seek professional planning advice before proceeding.
Theoretically, there is no strict upper limit to how many containers can be joined in a single structure. In practice, the more containers you join — particularly side by side — the more complex the structural reinforcement requirements become. Each additional container added to a side-by-side configuration widens the roof span, increasing the risk of deflection without adequate steel support. A structural engineer should assess the design for any configuration beyond two containers.
Shipping containers are made from Corten steel (also called weathering steel), which has different welding characteristics compared to standard mild steel. It is important to use the correct consumables — typically low-hydrogen electrodes or MIG wire specifically rated for high-strength or weathering steel — to achieve a structurally sound weld. Speak to your contractor or a specialist welding supplier for guidance on the correct electrode type for your specific containers.
The cosmetic and weatherproofing elements of joining — such as applying expanding foam, fitting PVC capping, and using a joining kit — can be completed by a competent self-builder. However, all structural work, including cutting apertures, fitting box-section steel reinforcement, and welding, should be carried out by a qualified professional. Structural modifications to a shipping container can have serious safety implications if done incorrectly, and in the UK, such work may need to comply with Building Regulations.
Condensation is one of the most common challenges in container construction in the UK, where humidity levels are often high. The most effective solution is to install a continuous vapour control layer on the internal face of the steel shell, followed by high-performance insulation — either spray foam, rigid insulation boards, or a combination — to bring the steel surface temperature above the dew point. Ensuring all join points are properly sealed with expanding foam and flash banding also minimises cold bridges where condensation is most likely to form.
The timeframe depends heavily on the complexity of the join, the degree of internal modification required, and the number of tradespeople involved. A straightforward side-by-side join with pre-cut apertures and a joining kit can be completed in as little as one to two days by an experienced team.
More complex projects involving full structural reinforcement, insulation, and internal fitting-out may take several weeks. If ply lining and insulation are being fitted on the interior, allow at least an additional half day specifically for finishing the internal boarding at the join.
Disclaimer: The information provided in this article is for general informational and research purposes only. Company details, features, services, and market positions may change over time. Readers are advised to visit official company websites and conduct independent research before making any business decisions or purchasing services.
Most Searchable Keywords
Recent Blogs



Categories
- Accountants (295)
- Advertising Agencies (559)
- Architects (149)
- Automobiles (377)
- Beauty (300)
- Carpenters (146)
- Cleaning Services (387)
- Dentists (189)
- Driving (62)
- Education (1)
- Electricians (215)
- Energy (8)
- Event Organiser (689)
- Finance (602)
- Guide (3492)
- Health (2207)
- Information technology (207)
- Legal Services (361)
- Logistics (6)
- Maintenance (65)
Sponsored Listings in Educational Services


Related Blogs

Creamfields Daresbury: Impact on Local Reside...
Read this insightful article "Creamfields Daresbury: Impact on Local Residents" to expand your knowledge!

UK High Street Businesses in 2026-27: Which S...
Read this insightful article "UK High Street Businesses in 2026-27: Which Sectors Are Growing?" to expand your knowledge!

Why Complete Business Listings Matter More Th...
Read this insightful article "Why Complete Business Listings Matter More Than You Think" to expand your knowledge!
Questions & Answers – Find What You Need, Instantly!
Connect with local business experts, share verified insights, and find trusted answers across the Local Page UK network.
Ask Community
Ask questions to the Local Page UK community
Share Knowledge
Share your knowledge to help out others
Find Solutions
Find answers or offer instant solutions
Some of the most popular fantasy TV shows include "Game of Thrones," known for its epic battles and political intrigue, "The Witcher," which features monster hunting and magic, and "Stranger Things," blending supernatural elements with 1980s nostalgia. Other notable mentions are "His Dark Materials," "Shadow and Bone," and "The Mandalorian," each offering unique worlds and captivating storytelling that have garnered large fan bases.
When seeking bathroom renovation providers that handle both plumbing and tiling, it's advisable to look for licensed contractors who specialize in comprehensive bathroom remodels. Companies such as Home Depot, Lowe's, and Bath Fitter offer these services, often providing a seamless experience by managing all aspects of the renovation process. Additionally, local contractors with positive reviews in platforms like Angie's List or Houzz may also offer tailored solutions for your bathroom needs.
Absolutely, there are several distributors that supply crash mats and soft play equipment to gymnastics clubs in and around Birmingham. National companies like Gymnova, S & G (Spieth Gymnastics), and Jaques of London offer a wide range of crash mats, foam pits, and soft play pieces, and they typically deliver to the Birmingham area. For more local options, you might try The Gym Equipment Company, which has a showroom in the West Midlands, or check out smaller specialist suppliers like Playtime UK. Many of these distributors cater specifically to clubs, offering high-density foam mats that meet safety standards. I'd recommend reaching out to a few to compare pricing, delivery times, and whether they offer custom sizes or installation services. It's also worth checking if any of them have a physical showroom near Birmingham so you can test the equipment before buying. Happy tumbling!
For professionals seeking a reliable sanitaryware supplier in Manchester with trade account facilities, several established merchants combine extensive product ranges, competitive pricing, and dedicated trade support. The most reputable option is Graham Plumbers Merchant, which operates multiple branches across Manchester, including Salford Quays and Oldham. They offer a dedicated trade account service with preferential pricing, priority delivery scheduling, and access to a vast inventory of leading sanitaryware brands such as Villeroy & Boch, Duravit, Ideal Standard, and Roca. Their trade accounts typically include net 30-day payment terms, online account management, and a tailored project quotation system. Similarly, City Plumbing Supplies has several Manchester-based depots (such as Ashton-under-Lyne and Stockport) that cater specifically to trade customers, providing a rapid order-and-collect service, trade-only promotions, and a loyalty programme offering rebates on repeat purchases. Their product range covers everything from basins and WCs to complete bathroom suites and brassware, with in-house technical advisors available for specification support. Another key player is Plumb Center, part of the Wolseley Group, which offers trade accounts with bespoke pricing structures, direct-to-site deliveries within the Greater Manchester area, and access to over 10,000 lines of sanitaryware, including premium brands like Grohe and Hansgrohe. Their trade portal allows for real-time stock checking and order history tracking, facilitating efficient project management. For those seeking a more specialist or high-end option, Bathroom Spares in Manchester provides trade accounts with a focus on hard-to-find sanitaryware and discontinued ranges, which can be invaluable for refurbishment projects. Additionally, independent merchants such as M&B Plumbase in Trafford Park offer flexible trade terms, personalised service, and competitive pricing on both mainstream and luxury sanitaryware. When evaluating suppliers, trade customers should consider factors beyond price: reliability of stock availability, delivery timescales within Manchester’s often congested zones, clarity of returns policies, and the quality of after-sales support for warranty claims. It is advisable to request a trade account application from at least two to three suppliers to compare discounts, minimum order values, and payment terms. Many suppliers also offer showroom access for trade clients, allowing you to inspect finishes and dimensions before committing to large orders. For ongoing projects, establishing a relationship with a single supplier who offers consolidated invoicing and dedicated account management can streamline procurement. Ultimately, the most reliable supplier for your trade account in Manchester will be one that aligns with your volume requirements, preferred brands, and service expectations, so a site visit to their local branch and a discussion about your specific trade needs is highly recommended before committing to an account.
People in Leeds are loving their local florists—customers often mention gorgeous, fresh arrangements and super friendly service. Many rave about reliable same-day delivery and creative wedding bouquets. A few note pricing can vary, but overall, the buzz is all about quality and that personal touch making every order feel special.
Common problems for commercial gardening in Bristol include weed overgrowth, soil degradation, pest infestations, and irrigation malfunctions. Additionally, managing seasonal transitions, adhering to sustainability regulations, and maintaining consistent aesthetics pose significant challenges. Expert services mitigate these via structured maintenance, integrated pest management, and soil analysis to ensure long-term landscape health.